News › Back in Stock
Add a Back-in-Stock Notify Me Form to Shopify Pages
When a product sells out, shoppers have two choices: bookmark it and remember to check back, or leave and never return. Most leave. A back-in-stock notification form changes that equation — it turns a dead end into a warm lead and brings the exact shoppers who already wanted that product straight back when stock returns.
This guide walks through how Notify Me works, where the button and form appear on your product pages, and how to set it up with Timesact from scratch.
---
What Is a Back-in-Stock Notification Form on Shopify?
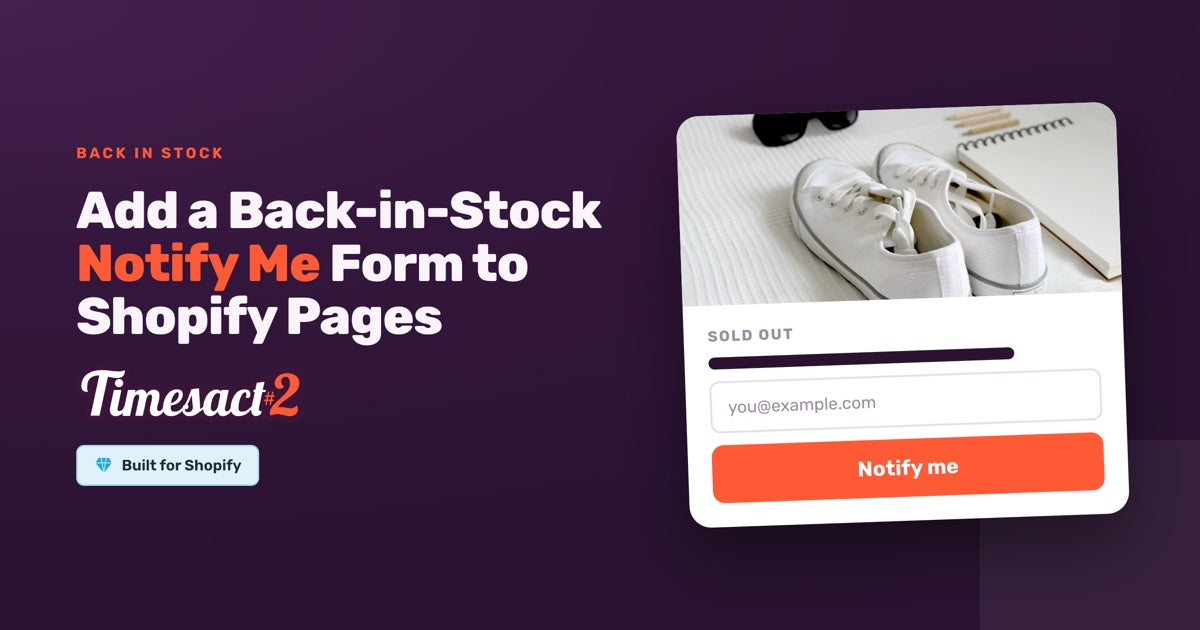
A back-in-stock notification form is a lightweight email capture that appears on sold-out product pages. Instead of showing nothing when a variant is out of stock, your product page shows a "Notify Me" button. Shoppers click it, enter their email, and receive an automated email the moment that variant is available again.
Timesact manages the full loop: the button, the signup form, the waitlist, and the outbound email. It runs on its own — the notification fires automatically from Timesact when stock is restored, no separate email tool required to get started.
A few things worth knowing up front:
- Alerts go out by email — and by SMS too if you switch on SMS signup in the Notify Me form (SMS is on paid monthly plans and charged per message) — sent automatically by Timesact when stock returns.
- The feature is variant-level. You can enable it on a single size or colorway without affecting the rest of the product.
- Signups collect into a Timesact waitlist for each variant, which you can export whenever you want.
---
Where Does the Notify Me Button Appear on a Product Page?
The "Notify Me" button replaces the standard Add to Cart button on any variant that has zero inventory and has Notify Me enabled in Timesact. It appears exactly where Add to Cart normally sits, so the placement is already familiar to shoppers — no separate widget or floating bar.
Here is what each storefront state looks like depending on inventory:
| Variant state | What appears on the product page |
|---|---|
| In stock | Standard Add to Cart button (Timesact not visible) |
| Out of stock, Notify Me enabled | "Notify Me" button (or your custom label) |
| Out of stock, Coming Soon enabled | Non-clickable Coming Soon button (visual only, no email capture) |
| Out of stock, Preorder enabled | Preorder button — customer places and pays for the order |
The Notify Me button and the Coming Soon button are separate features. Coming Soon replaces the buy button with a non-clickable state that signals the product isn't purchasable yet — it does not collect emails. Email capture for out-of-stock or upcoming products is always the Notify Me / Back in Stock feature.
---
How Do You Add a Restock Notification Form to a Shopify Product Page?
Setting up Notify Me in Timesact takes four steps. You do not need to touch your theme code.
Step 1 — Enable the Timesact App Embed
Open your Shopify Theme Customizer on the theme you publish, go to the App Embeds tab, and activate the Timesact embed, then click Save in the theme editor. This is the activation step that lets Timesact render on your storefront. Then reopen Timesact so the app picks up your theme.
Step 2 — Enable Notify Me on your products
In your Shopify admin, open the Timesact app and go to the Products tab. That's where you assign your Back in Stock Customer Experience to the products you want Notify Me on, with two ways to do it:
- By product — select individual products and enable Notify Me per variant.
- By collection — apply Notify Me to every out-of-stock variant in a collection at once.
The by-collection option is the fastest path for a large catalog. Any variant in that collection that hits zero inventory shows the Notify Me button automatically.
Step 3 — Set your button copy and your alert email
The copy lives in two places. In your Back in Stock Customer Experience (under Experiences), you set the button label and the success message a shopper sees after signing up — pick or create a Back in Stock Customer Experience for the variants you're enabling. In the Notifications tab, you set the back-in-stock email itself (the Notify Me email): the subject and body your subscribers receive when the variant returns to stock.
Each alert goes out for the specific variant the shopper asked about, so the back-in-stock email copy you write in the Notifications tab does a lot of the work in turning that alert into a return visit.
Step 4 — Test it on a real variant
Set a variant's inventory to zero in Shopify. Load the product page in a new browser tab or in an incognito window. The Notify Me button should appear in place of Add to Cart. Enter a test email, confirm the success message appears, then restock the variant to the quantity threshold set in your Back in Stock Customer Experience and see the notification email arrive. That completes the full loop.
---
How Do Customers Automatically Get an Email When a Product Returns?
Once a shopper signs up through the Notify Me form, Timesact adds them to a waitlist for that specific variant. When you update inventory in Shopify — manually, through a purchase order sync, or via any integration that writes stock back to Shopify — Timesact detects the inventory change and sends the notification email automatically.
You do not trigger the send manually. The email goes out once the variant's stock reaches the quantity threshold set in your Back in Stock Customer Experience, using the subject and body you set in the Notifications tab.
Shoppers receive one email per signup.
If you run Klaviyo, connect it under Billing & Account → Integrations and choose Klaviyo in your Back in Stock Customer Experience's Notifications: Timesact sends Timesact - Back in Stock Subscribed and Timesact - Back in Stock Ready events for your Klaviyo flows. Your subscribers also stay in Timesact, where you can export them as a CSV at any time to grow your email list with back-in-stock notifications and build segments around the products shoppers asked for.
---
How Do I Add a Restock Alert Signup Box on Sold-Out Product Pages?
"Restock alert signup box" is another name for the same Notify Me form. When Timesact's Notify Me is active on an out-of-stock variant, clicking the button opens the signup form so the shopper can enter their email and join the waitlist for that variant.
If you want to customize how the form looks, the button label and success message are editable in your Back in Stock Customer Experience. You can match your store's copy style — "Get notified when it's back," "Alert me," "Join the waitlist" — whatever fits your brand voice.
---
Managing Your Back-in-Stock Waitlist
Once signups start coming in, you have a few ways to work with the subscriber data.
Export subscribers. Open Analytics → Notify Me, Back in Stock and Waitlist → Trends over time, scroll down to the subscriber records, and export the list to CSV.
Bring subscribers into your ESP. With Klaviyo connected, sign-ups arrive as Timesact events you can segment on; for other email tools, import the exported CSV to segment shoppers by the product they're waiting on and fold them into your broader email program — the restock request becomes a signal your ESP can act on.
Review who's waiting. Your subscriber records sit under Analytics → Notify Me, Back in Stock and Waitlist → Trends over time, so you can see who's waiting. That view is useful when you're weighing restock quantities — the same waitlist thinking behind using back-in-stock alerts to plan restocks, pairing inventory planning with the email revenue the alerts bring back.
---
Turn your sold-out pages into a waitlist
Notify Me is ready to activate from inside the Timesact dashboard — no theme edits, no code, and no third-party email tool required to get started. Install Timesact on Shopify and turn your sold-out pages into a waitlist that brings shoppers back automatically. If you want a walkthrough of the setup for your specific catalog, book a free setup call and we will walk through it with you.
---
FAQs
How do you add a restock notification form to a Shopify product page?
Install Timesact, enable the App Embed in your Shopify Theme Customizer and click Save, then activate Notify Me for the relevant products or collections inside the Timesact dashboard. From there, the Notify Me button appears automatically whenever one of those variants goes out of stock — no theme code required.
How do I add a Notify Me When Back in Stock button to my product pages?
The Notify Me button is part of Timesact's Back in Stock feature. Once enabled per variant (or by collection), it replaces the Add to Cart button whenever that variant has zero inventory, and it reverts automatically when stock is restored.
How do I add a restock alert signup box on sold-out product pages?
In Timesact, open the Products tab, select the product or collection you want to cover, and assign your Back in Stock Customer Experience. On any variant that goes out of stock, the button opens the signup box so the shopper can enter their email and join the waitlist.
How do customers automatically get an email when a product returns?
Timesact monitors inventory levels in Shopify. When you add stock to a variant that has active Notify Me subscribers and it reaches the quantity threshold set in your Back in Stock Customer Experience, Timesact sends the notification email automatically using the subject and body you set in the Notifications tab — no manual trigger needed.
Can I export my back-in-stock subscriber list from Timesact?
Yes. Open Analytics → Notify Me, Back in Stock and Waitlist → Trends over time, scroll down to the subscriber records, and export the list to CSV.
Run this in Timesact
Pre-order, back-in-stock, coming-soon and more — one app, no code.
Install the app →